Bump Navel Piercing: Causes, Treatments, and Healing Guide

Getting a navel piercing is a popular form of self-expression, but the journey to fully healed jewelry often comes with unexpected challenges. Among the most common complications is the development of an unexplained bump near the piercing site. If you are navigating this situation, you are not alone. Understanding the underlying physiology, recognizing early warning signs, and implementing evidence-based aftercare can make the difference between permanent scarring and a smoothly healed piercing. This comprehensive guide breaks down everything you need to know about a bump navel piercing, from biological causes to dermatologist-approved interventions.
The human body’s response to a controlled wound like a piercing is a complex cascade of cellular activity. When a needle creates a fistula, your immune system immediately initiates inflammation, recruits fibroblasts, and begins collagen synthesis. Sometimes, this process becomes dysregulated due to mechanical stress, improper hygiene, or substandard materials, resulting in localized swelling, tissue overgrowth, or fluid accumulation. Rather than panicking, the most effective approach is systematic assessment, targeted intervention, and consistent sterile care. Below, we will explore the exact mechanisms behind these bumps, differentiate between harmless irritation and serious complications, and provide actionable, medically sound strategies to restore your piercing to health.
Understanding the Anatomy and Physiology of Navel Piercings
To properly manage a bump navel piercing, it is essential to first understand the unique anatomical landscape of the umbilical region. Unlike earlobe or lip tissue, the navel presents a folded, warm, and often moist environment that can trap bacteria, sweat, and dead skin cells. The tissue density around the umbilicus varies significantly between individuals, and some people naturally have thicker dermal layers or more prominent subcutaneous fat that can influence healing trajectories. A properly placed navel piercing typically passes through a firm ridge of tissue that creates a secure anchor, avoiding penetration directly into the navel cavity itself. When this anatomical guideline is ignored, the body often responds with defensive inflammation that manifests as persistent swelling or raised tissue.
The Cellular Healing Timeline
Wound healing occurs in three overlapping phases: inflammatory, proliferative, and remodeling. During the first few days to two weeks, the inflammatory phase dominates. Blood vessels dilate, white blood cells migrate to the site, and the body forms a provisional matrix. This is when mild redness, tenderness, and clear or pale fluid drainage are completely normal. For a detailed breakdown of these biological stages, review the National Institutes of Health (NIH) wound healing overview. If mechanical stress is applied during this phase, the body extends the inflammatory response, often producing excess fluid and localized swelling.
The proliferative phase spans roughly weeks two through eight. Fibroblasts produce collagen, new capillaries form through angiogenesis, and the epithelial tissue begins migrating inward to line the fistula. This is the most vulnerable period for developing a bump navel piercing. Any friction from tight clothing, excessive movement during sleep, or harsh cleaning agents will trigger the body to lay down disorganized collagen, creating a firm, raised papule.
Remodeling is the final phase and can last from six months to over a year. During remodeling, collagen cross-links, the fistula matures, and the tissue gradually softens. Consistent care throughout this extended window is non-negotiable for preventing late-stage complications. Understanding this biological timeline helps set realistic expectations and discourages premature jewelry changes or aggressive cleaning routines that sabotage natural recovery.
Why the Umbilical Region Requires Special Attention
The belly button naturally harbors a diverse microbiome. Studies have identified hundreds of bacterial and fungal species within the umbilicus under normal conditions. While most are harmless commensals, introducing a fresh wound into this ecosystem requires strict hygiene discipline. Poor ventilation from high-waisted garments, trapped moisture from workouts or swimming, and friction during daily movement all contribute to localized hypoxia and cellular stress. These environmental factors directly correlate with the formation of irritation bumps. Following CDC guidelines for skin hygiene and infection prevention can significantly reduce microbial load in the area. By recognizing the anatomical vulnerabilities of the navel, you can proactively adjust your lifestyle to support uninterrupted healing.
What Exactly Causes a Bump Navel Piercing?
When clients report a bump near their piercing, the first clinical question is always etiology. Not all bumps share the same origin, and misdiagnosis frequently leads to inappropriate home remedies that worsen the condition. The primary culprits fall into three distinct categories: mechanical irritation, localized infection, and abnormal scar tissue proliferation.
Irritation and Mechanical Trauma
Irritation bumps are by far the most common cause of tissue elevation around healing piercings. They typically appear as small, firm, pink or skin-colored papules adjacent to the piercing hole. The root cause is almost always external stress on the fistula. Common triggers include jewelry that is too long or too short, low-quality materials causing metal sensitivity, sleeping directly on the piercing, and excessive movement during exercise. When tissue experiences chronic micro-trauma, blood flow increases locally, and the body attempts to reinforce the area by depositing excess collagen. This defensive mechanism results in a hypertrophic reaction that presents as a bump navel piercing. The good news is that irritation bumps are reversible once the triggering factor is eliminated.
Bacterial Infection and Biofilm Formation
While less common than irritation, bacterial infections require immediate medical attention. Pathogenic bacteria such as Staphylococcus aureus, Pseudomonas aeruginosa, and Streptococcus species can colonize the piercing channel, especially if hygiene protocols are neglected. Unlike irritation, an infected bump will often feel hot, throb constantly, and produce thick, yellow-green pus with an unpleasant odor. Surrounding erythema may spread outward in streaks, and systemic symptoms like low-grade fever or swollen lymph nodes can occur. Consult the Mayo Clinic's resources on skin infection symptoms and treatment to accurately identify when medical intervention is necessary. In some cases, bacteria form a protective biofilm on the jewelry surface, making topical cleaning insufficient and necessitating professional medical evaluation and possibly oral antibiotics. Differentiating infection from irritation is critical to avoid dangerous delays in treatment.
Hypertrophic Scarring Versus Keloids
True scar tissue complications occur when fibroblast activity becomes dysregulated during the proliferative phase. Hypertrophic scars remain confined to the original wound boundary, are typically reddish or pink, and may gradually flatten over 12 to 18 months. Keloids, however, extend beyond the initial trauma site, continue growing indefinitely, and often carry a genetic predisposition, particularly in individuals with darker skin tones. The Cleveland Clinic's clinical overview of keloid formation highlights that keloid formation is an aggressive fibrotic response that rarely resolves without dermatological intervention. Many people mistakenly label every firm bump as a keloid, leading to unnecessary anxiety and premature removal of jewelry. Proper diagnosis requires evaluating growth patterns, genetic history, and tissue behavior over several weeks.
How to Accurately Diagnose Your Piercing Bump
Self-assessment is the first step toward appropriate care, but it must be grounded in clinical observation rather than internet speculation. Tracking your symptoms over a 7 to 10 day period while documenting changes provides valuable insight for professional consultation if needed. Below is a comprehensive comparison table to help you distinguish between common piercing complications.
| Feature | Irritation Bump | Localized Infection | Hypertrophic Scar | Keloid |
|---|---|---|---|---|
| Appearance | Small, pink, firm papule | Red, swollen, may have pus | Raised, stays within wound boundary | Bulging, extends beyond wound, shiny |
| Pain Level | Mild to moderate, tender to touch | Throbbing, constant, severe pain | Mild, occasionally itchy | Mild to moderate, may be sensitive |
| Discharge | Clear or pale lymph, dries crusty | Thick, yellow/green, foul smell | Minimal to none | None, dry or slightly flaky |
| Onset | Days to weeks after trauma | Usually 1 to 4 weeks post-piercing | 4 to 8 weeks into healing | Weeks to months, may grow slowly |
| Response to Care | Flattens quickly after removing irritant | Requires medical treatment/antibiotics | Flattens slowly over months | Grows despite care, needs injections |
Signs of Normal Healing vs. Problematic Swelling
During the first two weeks, mild elevation around the piercing is completely physiological. This is part of the body’s natural inflammatory response and should gradually diminish as you maintain sterile cleaning and avoid friction. Problematic swelling, however, presents with asymmetrical bulging, persistent heat, increasing pain intensity, or sudden fluid accumulation that does not drain cleanly. If the bump appears overnight after a minor bump or catch, it is likely acute trauma. Documenting daily changes with clear photographs and a symptom journal will help you or a healthcare provider track progression accurately. Consistency in observation prevents both overreaction and dangerous underestimation of serious complications.
When Self-Diagnosis Falls Short
Home assessment is useful for routine monitoring, but certain red flags demand professional evaluation. Rapid expansion, bleeding that will not stop after gentle pressure, fever above 100.4°F, foul-smelling discharge, or jewelry becoming embedded in swollen tissue are immediate indicators to consult a board-certified dermatologist, primary care physician, or an Association of Professional Piercers (APP) certified technician. Attempting to treat advanced infections or aggressive scar tissue with over-the-counter remedies delays healing and increases the risk of permanent tissue damage or systemic spread. Professional diagnosis ensures that you receive targeted, safe interventions tailored to your specific presentation.
Evidence-Based Management and Treatment Strategies
Once the type of bump is identified, implementing a structured care protocol becomes essential. The foundation of all successful navel piercing recovery rests on consistent sterile hygiene, appropriate jewelry specifications, and strict avoidance of harmful myths perpetuated by outdated aftercare traditions.
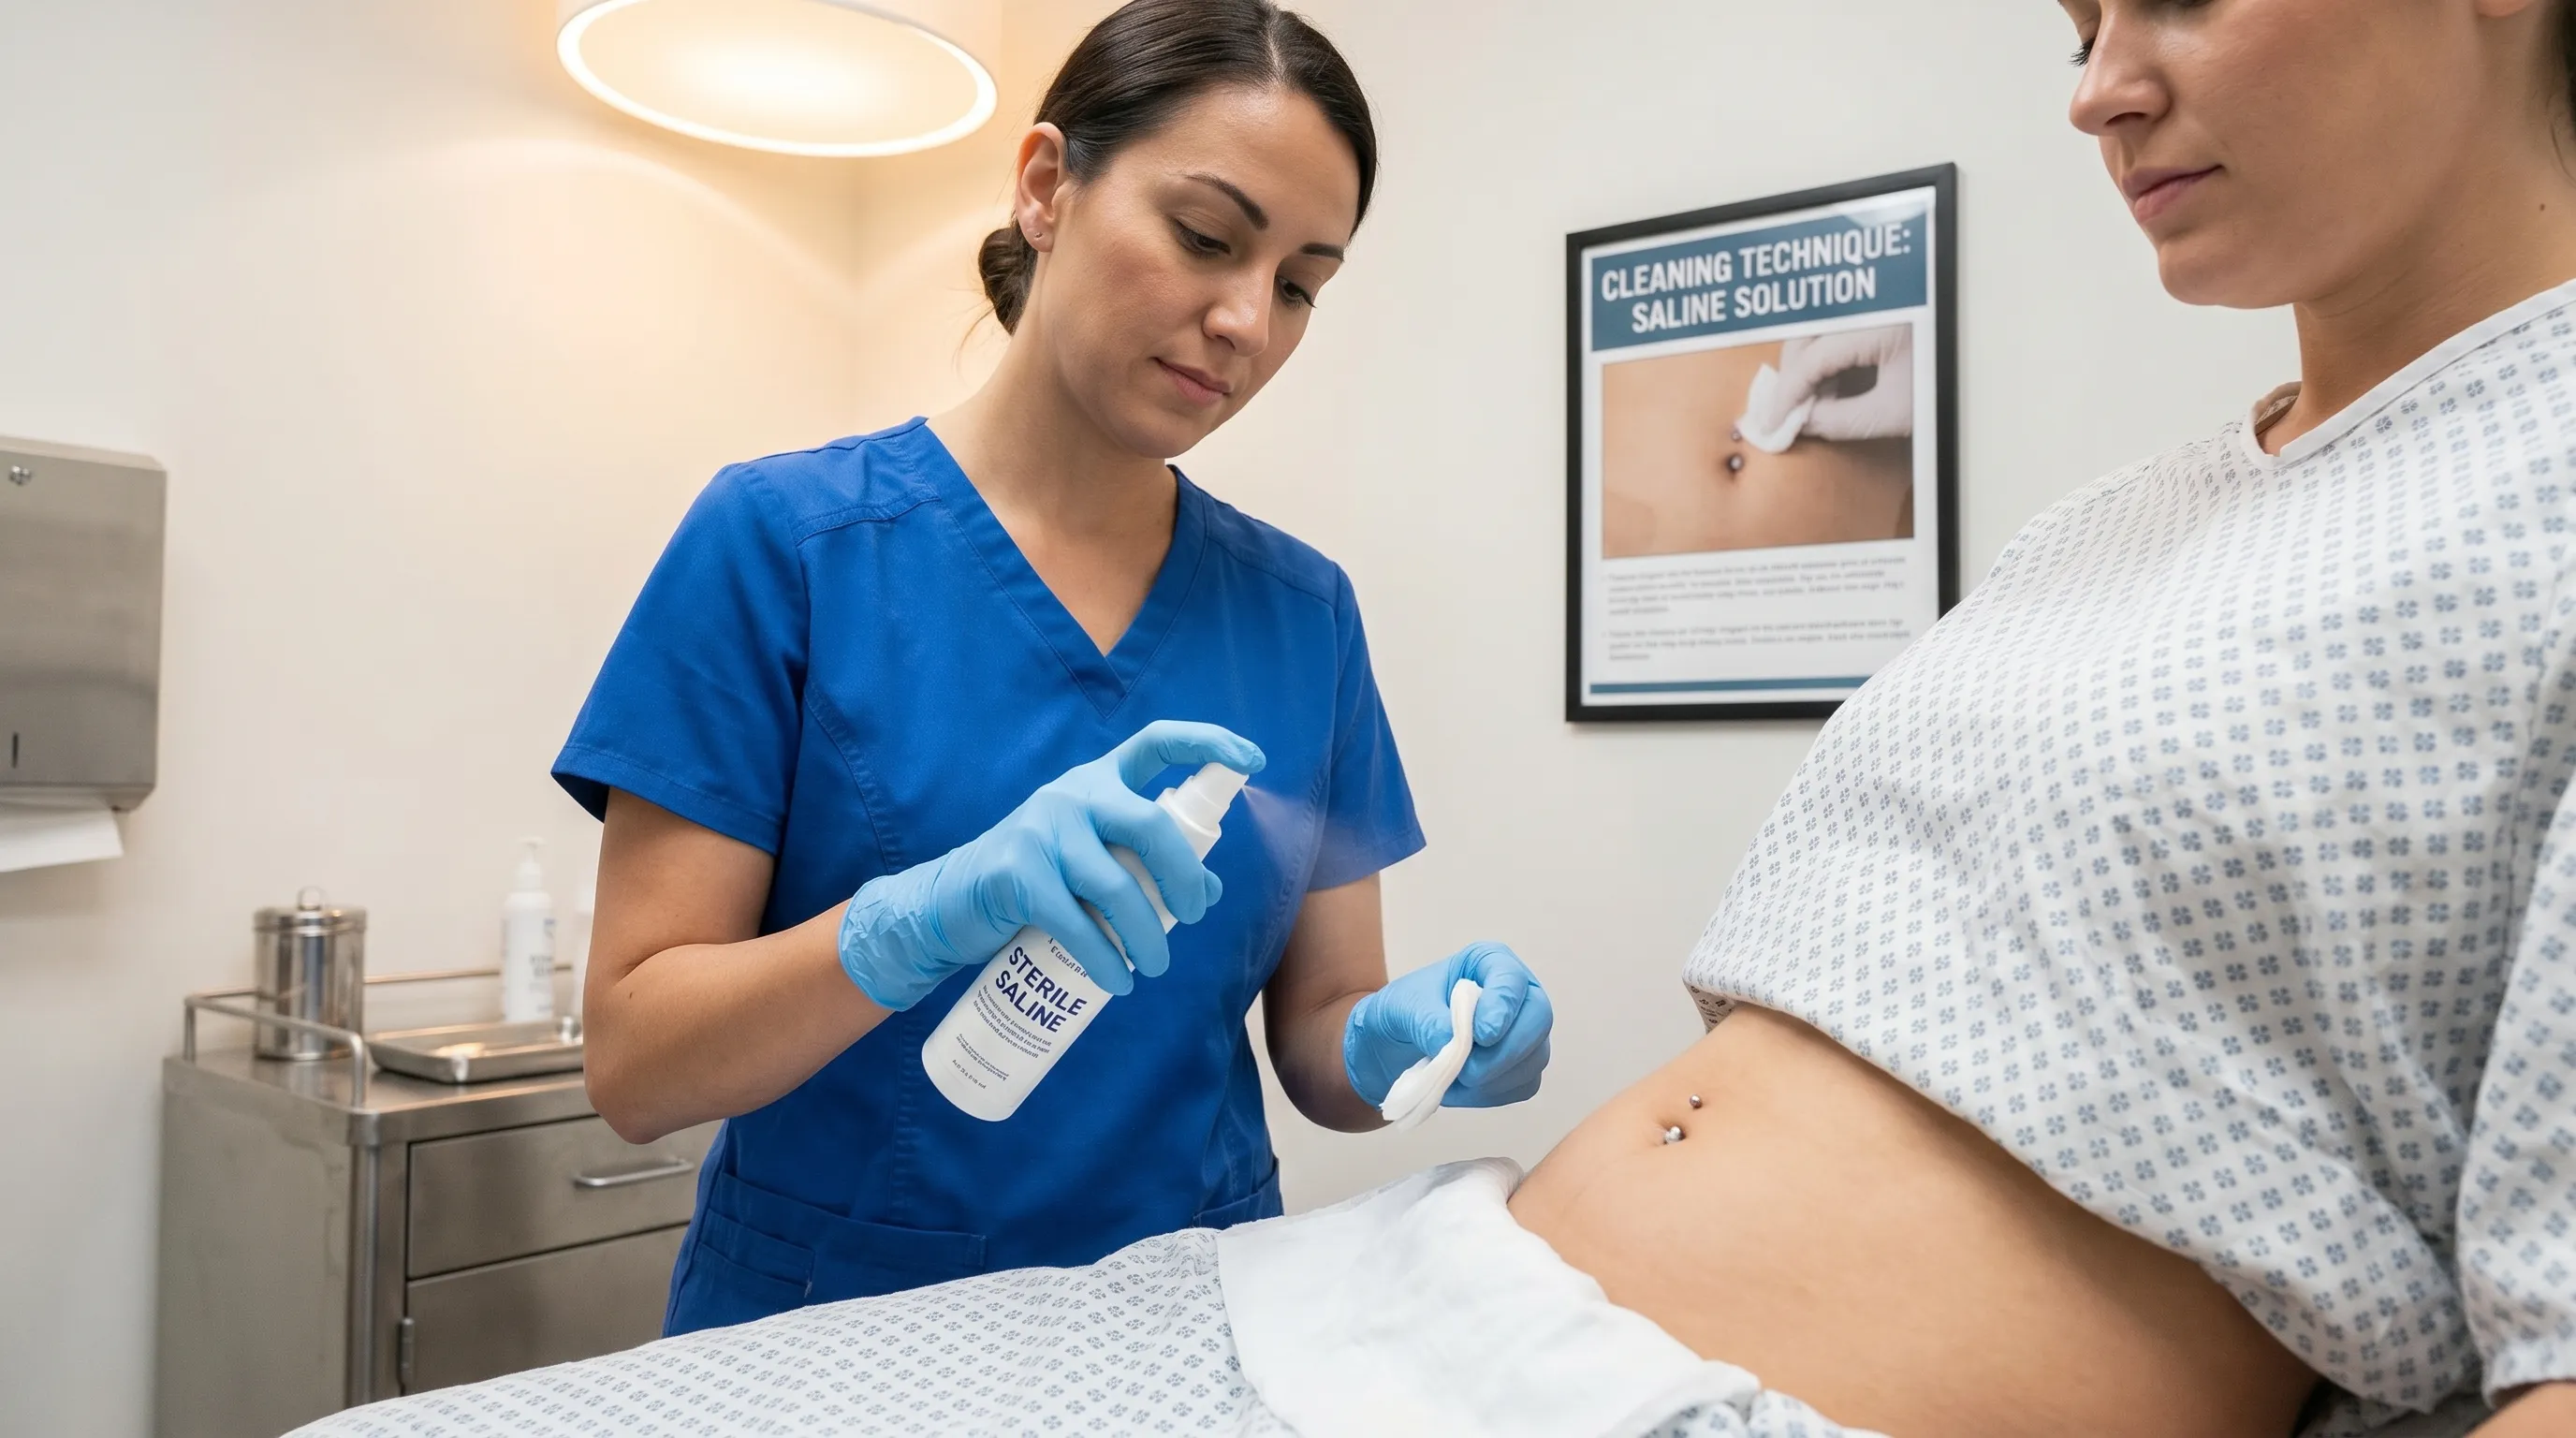
The Sterile Saline Protocol
Wound cleansing remains the cornerstone of piercing maintenance. Modern clinical guidelines strongly recommend using pre-packaged sterile saline solution labeled as 0.9% sodium chloride without preservatives. This concentration matches human extracellular fluid, making it isotonic and non-damaging to delicate healing tissue. Prepare a small, sterile cup or use clean, lint-free gauze soaked in saline to gently apply to the piercing site twice daily for three to five minutes. Avoid spraying directly from pressurized bottles if possible, as the force can disrupt fragile tissue. After soaking, pat the area completely dry with a clean paper towel. Moisture retention around the navel creates a breeding ground for microbes and significantly increases irritation risk. For authoritative guidance on saline preparation and application, consult the official APP aftercare guidelines and review NIH wound irrigation recommendations.
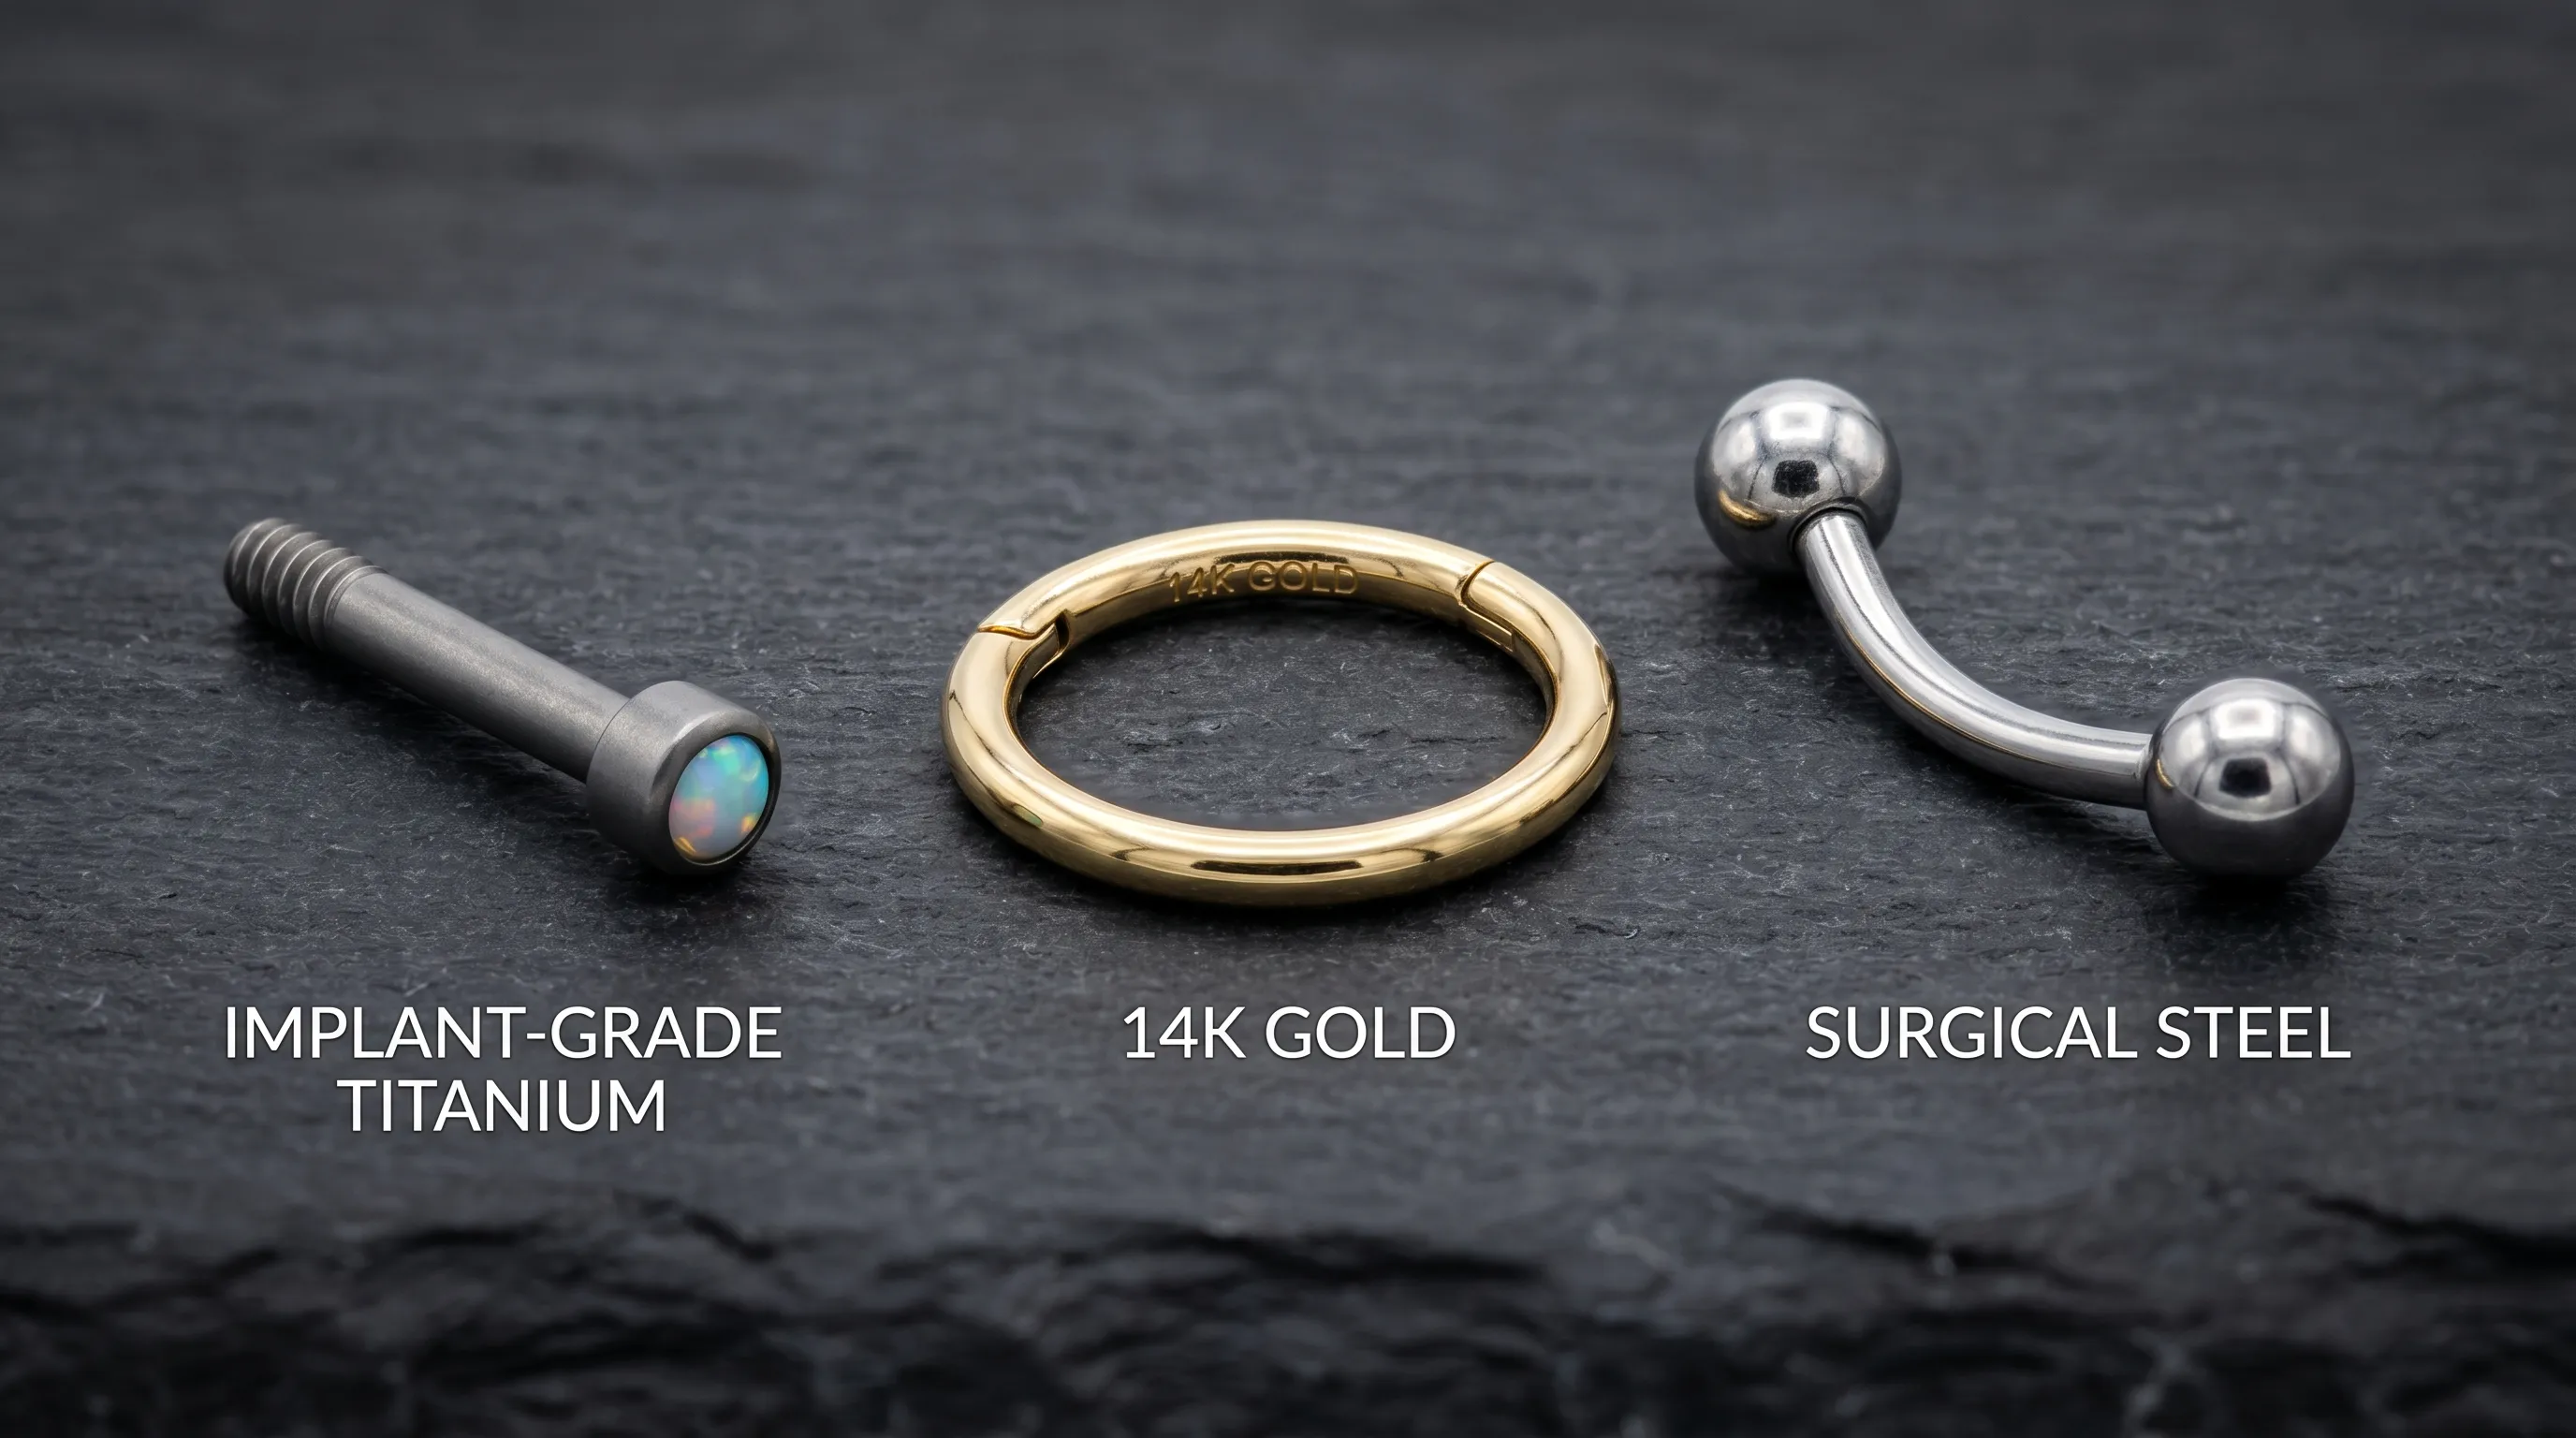
Jewelry Material and Gauge Optimization
The hardware placed inside your body directly influences cellular response. Many bumps navel piercing incidents are resolved simply by upgrading to implant-grade titanium (ASTM F136 or F67). This medical-grade metal contains zero nickel, exhibits exceptional corrosion resistance, and integrates seamlessly with human tissue. Jewelry should also feature a proper initial length to accommodate early swelling without being excessively long, as dangling bars create constant leverage that traumatizes the fistula. Downswell the barbell to a fitted length around weeks six through eight once edema subsides, but only after a trained professional confirms the fistula is stable enough for jewelry changes. Avoid acrylic, mystery "surgical steel," and externally threaded designs that drag bacteria through the wound channel during insertion.
What NOT to Do (Myths Debunked)
The internet is flooded with dangerous DIY piercing treatments that actively sabotage wound healing. Tea tree oil, despite its antimicrobial properties, is highly cytotoxic to fibroblasts and keratinocytes, delaying epithelialization and causing chemical burns. Aspirin pastes create an acidic environment that erodes healthy tissue. Alcohol, hydrogen peroxide, and iodine solutions destroy newly forming cells and prolong the inflammatory phase, directly contributing to persistent bumps. Rotating jewelry introduces environmental pathogens into the fistula and tears delicate granulation tissue. Removing jewelry prematurely during an infection traps bacteria inside the closing channel, potentially causing abscess formation. Sticking to evidence-based protocols and discarding viral social media hacks is essential for resolving a bump navel piercing safely.
Advanced Interventions When Home Care Isn't Enough
Despite meticulous at-home protocols, some bumps require clinical intervention. Persistent tissue elevation beyond eight to ten weeks, progressive enlargement, or symptoms unresponsive to jewelry changes and saline soaks warrant professional evaluation. Understanding available medical and procedural options empowers you to make informed decisions alongside your healthcare provider.
Professional Piercer Assessment and Downsizing
An experienced piercer certified by reputable organizations can evaluate fistula alignment, measure swelling accurately, and determine whether the initial jewelry length is contributing to chronic irritation. They may recommend switching to a shorter barbell, adjusting the bend radius on a curved barbell, or transitioning to a flat-back labret if anatomy allows. Professional piercers also utilize sterile, single-use instruments and autoclave-processed jewelry to prevent cross-contamination. If a bump persists after downsizing and optimized aftercare, they will refer you to a medical specialist. Never attempt jewelry changes on an inflamed bump yourself, as improper handling can cause embedding, tearing, or sudden closure of the outer fistula while trapping debris inside.
Dermatological Treatments and Corticosteroid Injections
When hypertrophic scarring or keloid formation is confirmed, board-certified dermatologists offer targeted therapies. Intralesional corticosteroid injections, typically containing triamcinolone acetonide, reduce fibroblast activity, decrease collagen synthesis, and gradually flatten raised tissue. Multiple sessions spaced four to six weeks apart are often necessary. Cryotherapy, which uses extreme cold to destroy excess scar tissue, may be combined with injections for enhanced results. Silicone gel sheets and medical-grade pressure dressings are also proven adjuncts that modulate scar remodeling through hydration and mechanical regulation. For comprehensive clinical information on scar management, review the American Academy of Dermatology guidelines and consult broader WHO recommendations on wound and scar care.
Comprehensive Prevention for Future Complications
Prevention remains far more effective than reactive treatment. By establishing proactive habits before, during, and after the piercing process, you significantly reduce the likelihood of developing a bump navel piercing. Long-term success depends on lifestyle adjustments, meticulous hygiene, and respecting the biological timeline of wound maturation.
Aftercare Hygiene and Lifestyle Adjustments
Maintain a strict cleaning schedule using sterile saline only for the first six to eight weeks. Avoid submerging the piercing in pools, hot tubs, lakes, or bathtubs until fully healed, as standing water contains pathogens and chemical irritants. Wear loose, breathable clothing during the initial months to prevent fabric friction and trapped moisture. If you exercise regularly, shower promptly after sweating and clean the area with saline. Keep hair products, lotions, and perfumes away from the navel to avoid chemical disruption of the healing environment. Sleep on your back or side to eliminate direct pressure on the jewelry. Consistency is non-negotiable; skipping cleaning sessions or neglecting moisture management is the most common reason benign irritation escalates into chronic bump formation.
Activity Restrictions During Initial Healing
The first three months demand significant behavioral modifications. Avoid core-intensive workouts that repeatedly compress or stretch the abdominal region, as micro-movement delays fistula stabilization. Contact sports, high-intensity interval training, and heavy weightlifting that engages the rectus abdominis should be paused or significantly modified. If you cannot avoid certain activities, secure the jewelry temporarily with sterile non-adherent gauze padding during workouts, remove it immediately after, and perform thorough saline cleansing. Pregnancy significantly alters navel anatomy due to abdominal expansion; many pregnant individuals experience migration or rejection of existing navel piercings. Consulting a healthcare provider early ensures safe management if anatomical shifts occur. Respecting these temporary limitations protects your investment and prevents irreversible tissue damage.
For additional insights on proper body modification safety and long-term healing strategies, explore educational resources from verified medical organizations at the Mayo Clinic's expert answers on body piercings.
Frequently Asked Questions
How long does it take for a bump navel piercing to heal completely?
Complete healing varies based on individual biology, jewelry quality, and aftercare consistency. Most irritation-related bumps resolve within two to six weeks after removing the source of trauma. True fistula maturation for a navel piercing takes six to twelve months, during which the tissue gradually strengthens and stabilizes. Patience and adherence to sterile saline cleaning protocols remain essential throughout this extended period.
Can I use essential oils or tea tree oil to shrink the bump?
No. Essential oils, including tea tree, oregano, and peppermint, contain potent chemical compounds that are cytotoxic to healing tissue. Applying these substances disrupts the cellular regeneration process, causes contact dermatitis, and frequently worsens bump formation. Evidence-based wound care relies solely on sterile saline for cleansing, as it maintains optimal osmotic balance without damaging newly forming epithelium.
Is it safe to change my jewelry while a bump is present?
Only if the change is necessary and performed by a trained professional using sterilized equipment. Changing jewelry yourself on a swollen, irritated piercing can introduce bacteria, cause tearing, or embed the jewelry in edematous tissue. In most cases, the priority is downsizing the existing barbell to reduce leverage rather than swapping styles. Wait until active inflammation subsides before considering cosmetic changes.
Will removing the jewelry make the bump disappear faster?
Removing jewelry during active inflammation often traps infection inside the closing channel and can lead to abscess formation. Additionally, scar tissue may continue expanding even after jewelry removal, particularly with keloid-prone individuals. Unless a medical professional explicitly advises immediate removal, it is generally safer to downsize to a shorter, high-quality barbell and continue sterile aftercare until the bump resolves naturally.
Can diet and hydration impact piercing bump formation?
While nutrition does not directly cause or cure piercing bumps, systemic health significantly influences wound healing speed and immune response. Adequate protein intake supports collagen synthesis, while vitamins C, zinc, and omega-3 fatty acids reduce unnecessary inflammation. Chronic dehydration impairs tissue elasticity and delays fistula stabilization. Maintaining a balanced diet and drinking sufficient water creates an optimal internal environment for smooth, complication-free healing.
Conclusion
Navigating a bump navel piercing can feel frustrating, but understanding the biological mechanisms behind tissue elevation transforms anxiety into actionable care. Most bumps result from mechanical irritation, improper jewelry materials, or disrupted aftercare routines rather than dangerous pathology. By implementing a strict sterile saline protocol, upgrading to implant-grade titanium, eliminating harmful DIY myths, and allowing adequate time for fistula maturation, you can successfully resolve complications and achieve a healthy, long-lasting piercing. Always prioritize professional evaluation when symptoms suggest infection, rapid tissue expansion, or abnormal scarring. Consistency, patience, and evidence-based practices are the definitive keys to overcoming this common challenge and enjoying your body modification safely for years to come.
About the author
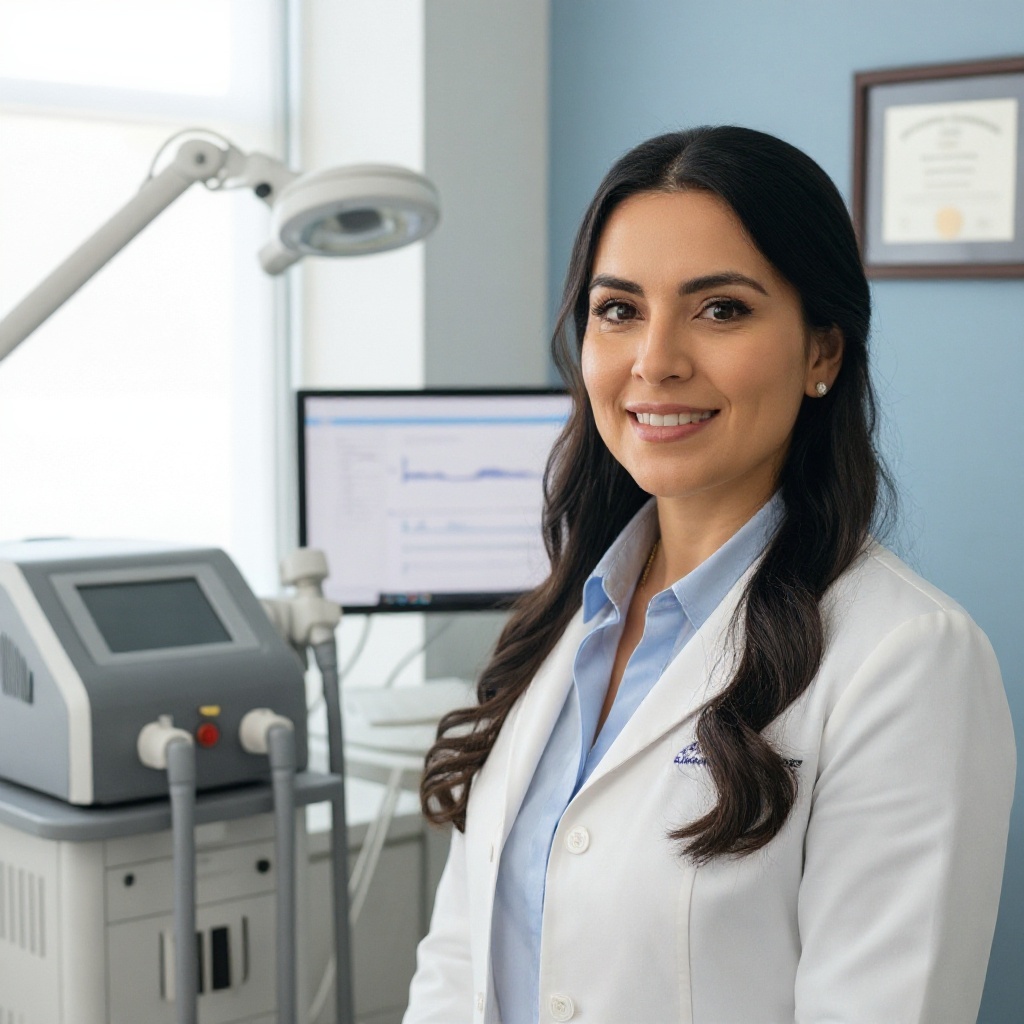
Elena Vance, MD, is a double board-certified dermatologist and pediatric dermatologist. She is an assistant professor of dermatology at a leading medical university in California and is renowned for her research in autoimmune skin disorders.